

Inside: Powerpoint isn't just for presentations! Check out these cool PowerPoint tips and create practically any type of document for your business!
I know the thought – why would I need cool PowerPoint tips? It’s just for presentations. No way. This is a pretty simple and yet deceivingly powerful program that allows you to make just about anything. I’d like to share some PowerPoint tips with you.
As a middle school teacher and teacher-author for TeachersPayTeachers, I use this program a lot. It is my number one go-to program for creating both in the classroom and out. This is why everyone can use a few PowerPoint tips to make life easier.
Because I depend on it so heavily, I am often looking for ways to streamline the way I work in order to be more productive. Here are 7 PowerPoint tips I am sure will be helpful to you.
Disclaimer: I use a Mac, so some buttons may function differently than when using a PC.
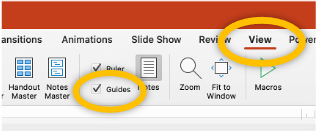
Lining objects up can be done in a few ways: by eye (not recommended), through using the align buttons, or through the use of Guides. I like to use the guides because they are faster than using the Align buttons and they are always there to use as a quick reference.
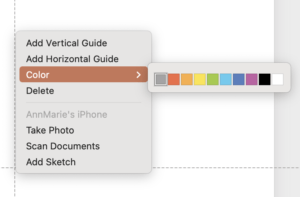
Also, did you know you could add more guides? You can also change their color. Simply right click the guide and bring up the menu. This will allow the user to change the colors of the guides, add more guides, or remove them. They offer a great visual way to line up your work without stopping to use arrange>align>align left, etc.
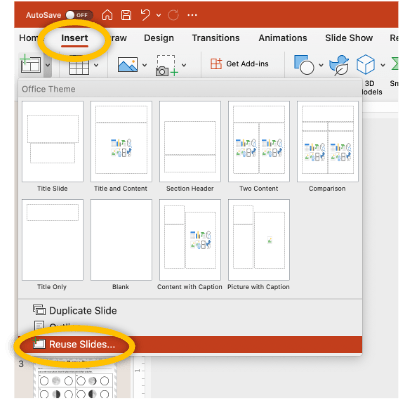
Have a document you use over and over? If you need to access that document to insert it into new documents, there is a shortcut called Reuse Slides. I personally use my TOU page for my created documents in TeachersPayTeachers every time I create a product. This means I need to insert it into just about everything I do. Opening it, copying it, and pasting it is too time consuming. PowerPoint has a fix to that. To make your life easier, just go to Insert>Reuse Slides. This will bring up the window to choose a previously created document and will seamlessly insert it into the document you are currently working on. This is a great time saver if you have a document that is used often.
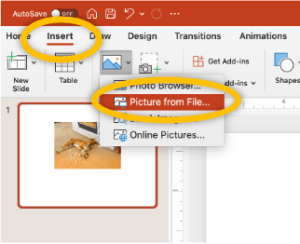
Most people know how to use the basic crop feature. PowerPoint has a neat feature that allows the user to crop a picture to just about any shape possible. To try it out, get a picture. Go to insert> picture>picture from file. With the picture selected, click the picture format tab, then crop>crop to shape. Pick any shape and your picture will crop to that shape. This really makes a great way to add a little flair to your pictures.
This is an example of the crop to shape tool used on a picture of my puppy. Yes, that big doof is under one year old and we were enjoying a snow day together when I took this picture. I got to drink an extra cup of coffee and he got to rip apart one of his brand new toys. Such a great day!
I use this feature a lot when I create my interactive digital resources. I often have my students drag the correct word or phrase to a specific area and I do not want them to be able to manipulate the words inside them. This is for two reasons: it is annoying when users try to drag and drop the shape and instead the cursor pops up to edit instead of the picture moving. Also, and (this is a big one) I teach middle school. If that doesn’t immediately say enough, I’ll say that I do NOT want my students to be able to change the words. I can just imagine what they would change the words to say. Just think of what you would have done when you were in middle school. 😳
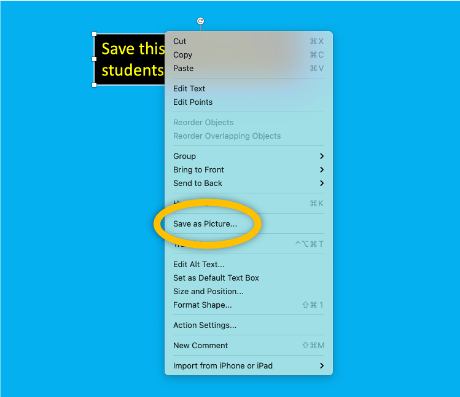
In order to save text or any object you create as a picture, simply select the object and then right click. In this menu is an option to save as a picture. Select JPG or PNG and tell PowerPoint where to save. Then, go to Insert>Pictures>Picture from file to find the new picture you created. This turns your text boxes and designs into pictures that cannot be changed by fun-seeking tweens. 🙂
Keyboard shortcuts are a great way to save time, but they take some getting used to. Here are some lesser known ones that save a lot of time:
I absolutely LOVE this shortcut! I have over thirty templates saved in PowerPoint. Some examples to get you started saving templates are:
If you use PowerPoint and find it annoying to have to change the document size every time you use it, then this tip is definitely for you.
To use this, just open a new document, get it to a good starting point – my first template was paper sized, portrait, with no text boxes on it.
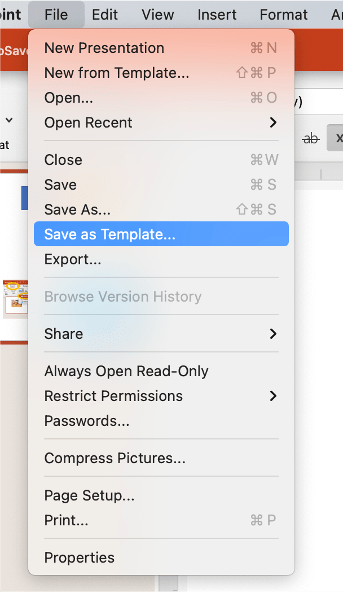
Once you have a document size you will use often, just go to file>Save as Template. Then, try it out! Go to File>New from Template and use your new time-saving template!
When working in PowerPoint, you can quickly realize that there are several buttons you use over and over. The next time you create a document, take a moment to keep track of what you are clicking on the most.
Then, configure your Quick Access Toolbar to help save you time. This feature of PowerPoint lets the user access any buttons quickly and in the order they choose. Keep reading to find out how to do this.
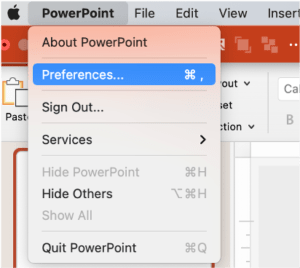
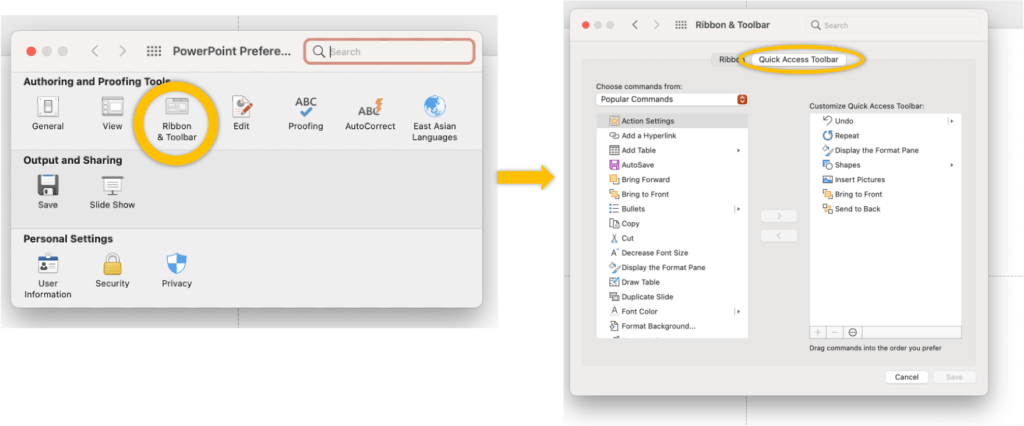
First, go to PowerPoint>Preferences. In the window, choose Ribbon and Toolbar and select Quick Access Toolbar. In this area, you can add or delete any buttons you access frequently. The results will show up in the top bar of your document.
I hope you enjoyed these PowerPoint tips! Please feel free to comment below and let me know if you were able to implement any of these into your creations.
One of my favorite sites to visit is a YouTube channel called PowerPoint University. If you are looking to create something from scratch, his video tutorials are wonderful!
This video tutorial on the right is just one small sample of some of the videos on this site. I really recommend checking it out.
If you are a complete newbie, try this Basic Tasks page created by Microsoft.
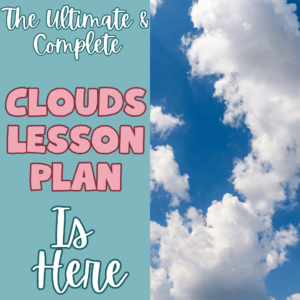
Finally, I invite you to visit my Ultimate Types of Clouds Lesson Plan Blog. Every material made for this resource was created by using PowerPoint, even the thumbnail shown on the left. I highly regard this program for all of its ways to make beautiful products.
I hope you learned a new helpful PowerPoint tip or two today!
| Cookie | Duration | Description |
|---|---|---|
| cookielawinfo-checkbox-analytics | 11 months | This cookie is set by GDPR Cookie Consent plugin. The cookie is used to store the user consent for the cookies in the category "Analytics". |
| cookielawinfo-checkbox-functional | 11 months | The cookie is set by GDPR cookie consent to record the user consent for the cookies in the category "Functional". |
| cookielawinfo-checkbox-necessary | 11 months | This cookie is set by GDPR Cookie Consent plugin. The cookies is used to store the user consent for the cookies in the category "Necessary". |
| cookielawinfo-checkbox-others | 11 months | This cookie is set by GDPR Cookie Consent plugin. The cookie is used to store the user consent for the cookies in the category "Other. |
| cookielawinfo-checkbox-performance | 11 months | This cookie is set by GDPR Cookie Consent plugin. The cookie is used to store the user consent for the cookies in the category "Performance". |
| viewed_cookie_policy | 11 months | The cookie is set by the GDPR Cookie Consent plugin and is used to store whether or not user has consented to the use of cookies. It does not store any personal data. |
3 Responses